Showing posts with label DIY. Show all posts

Wednesday, February 18, 2015

Accessorizing Basics: Clip-On Earrings for Clothes


~

I’ve always found beauty in dilapidated buildings. It’s one of my small pleasures to explore rundown places, especially ones with strong character. Those places are the perfect canvases to imagine stories as a writer. 

This was my first time working with the amazing photographer, Nina Tellier, and she couldn’t have picked a more interesting place to work in. She's a fantastic photographer - please check out her body of work in the links above!

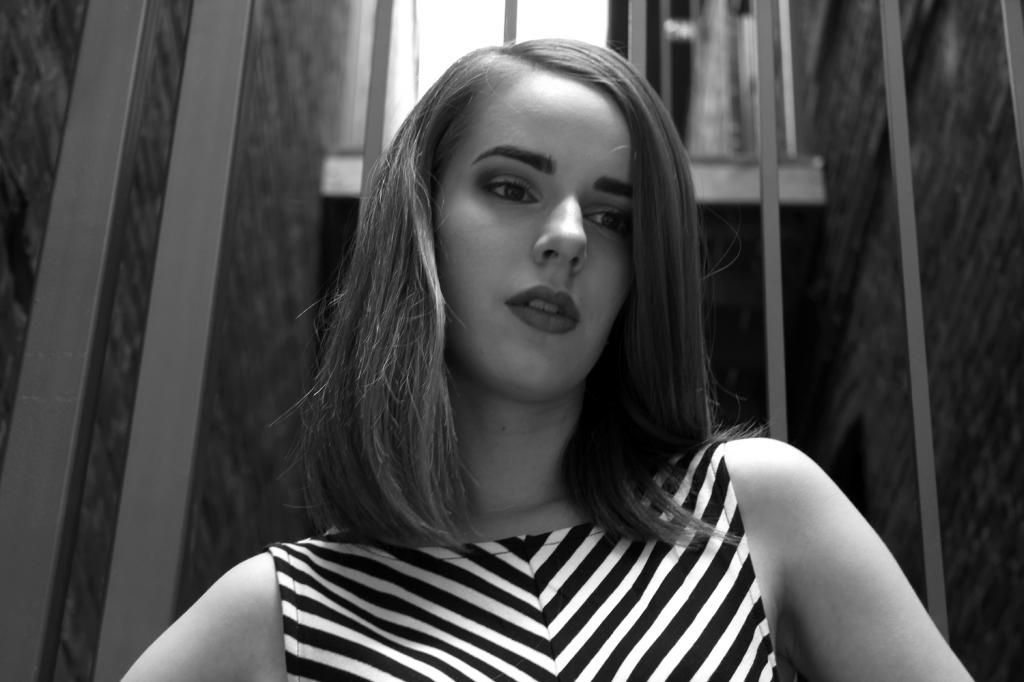
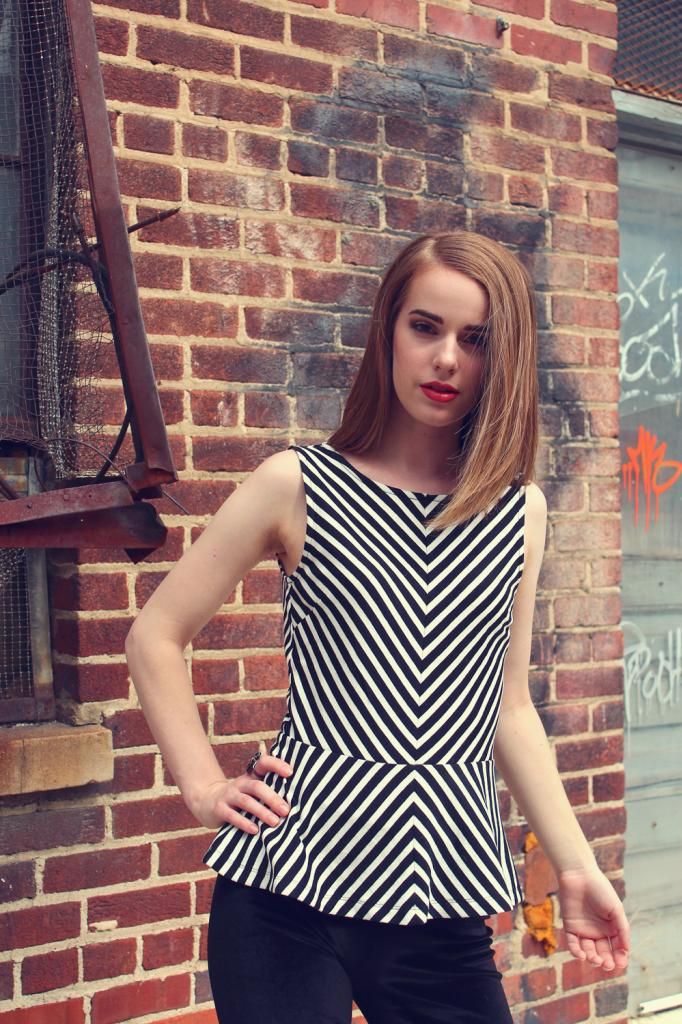
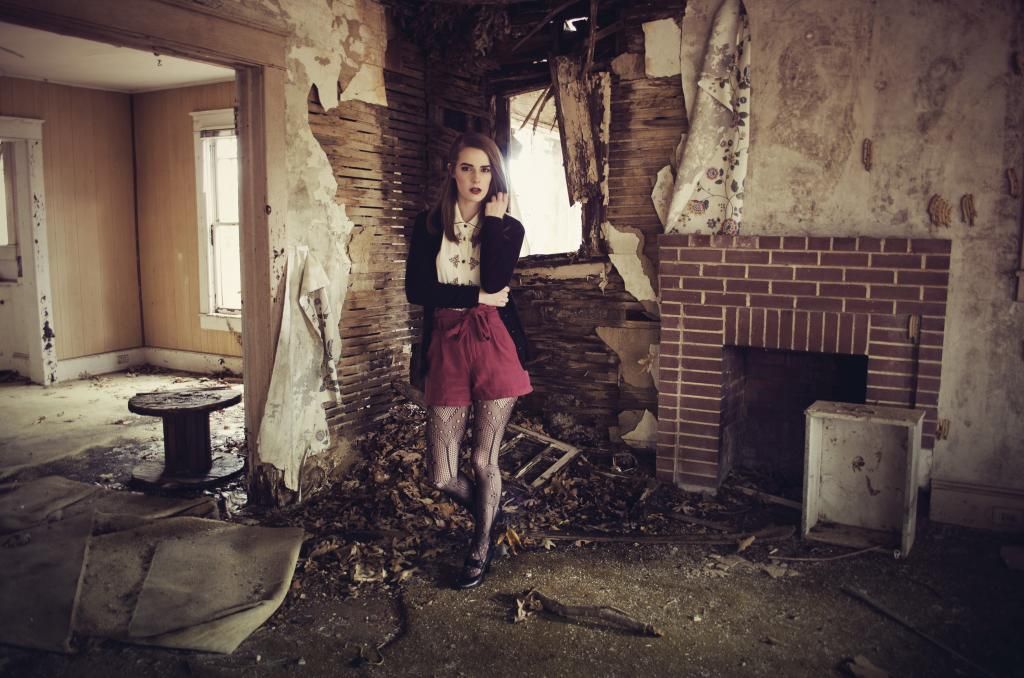
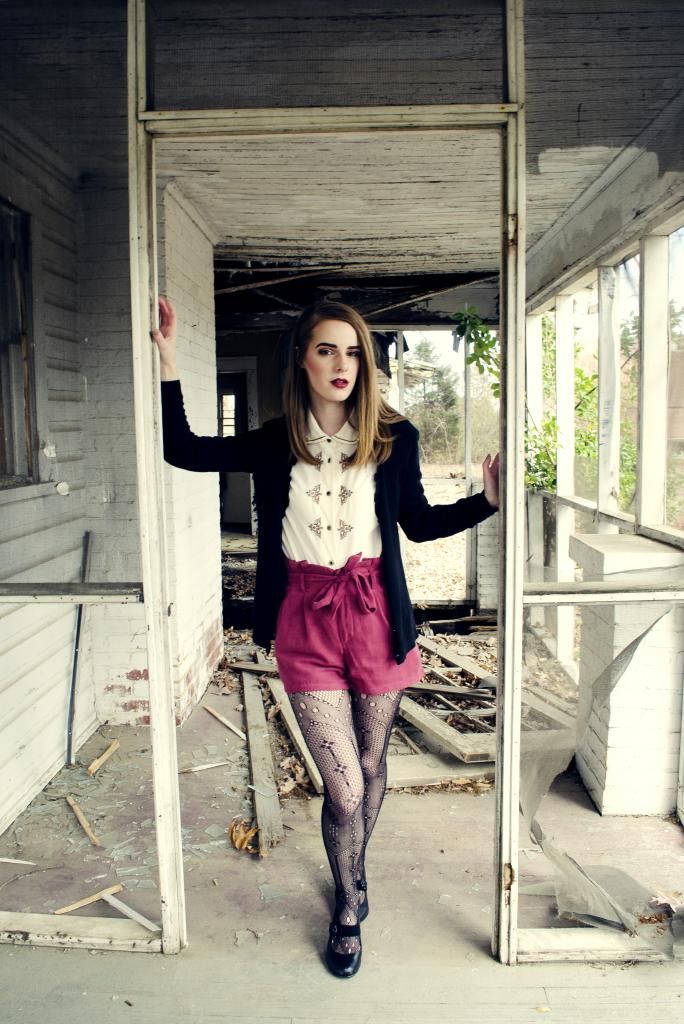
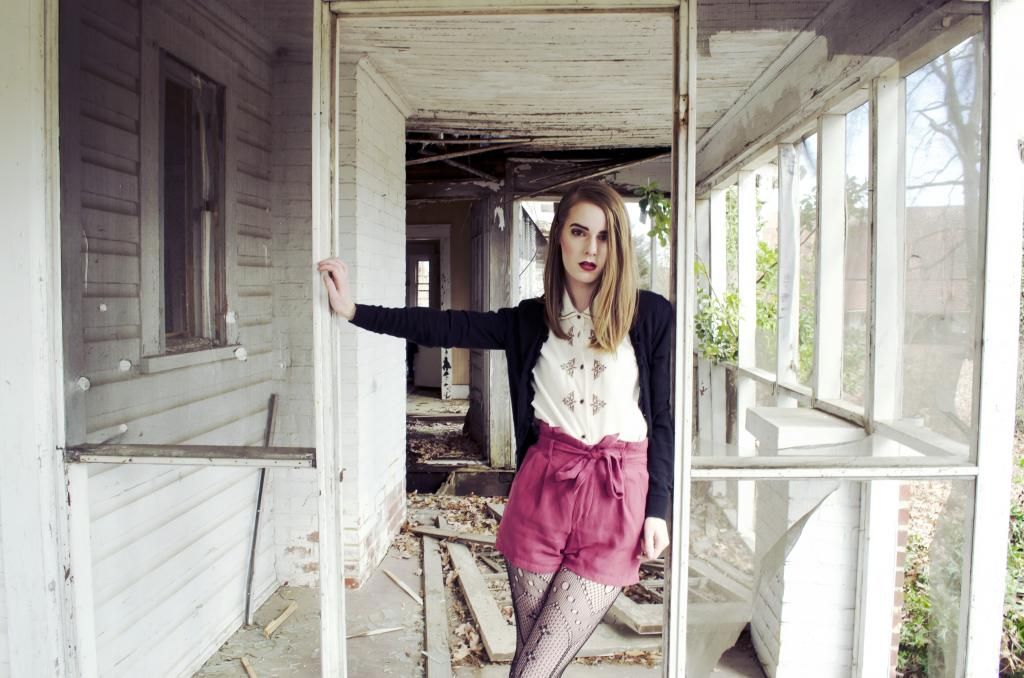
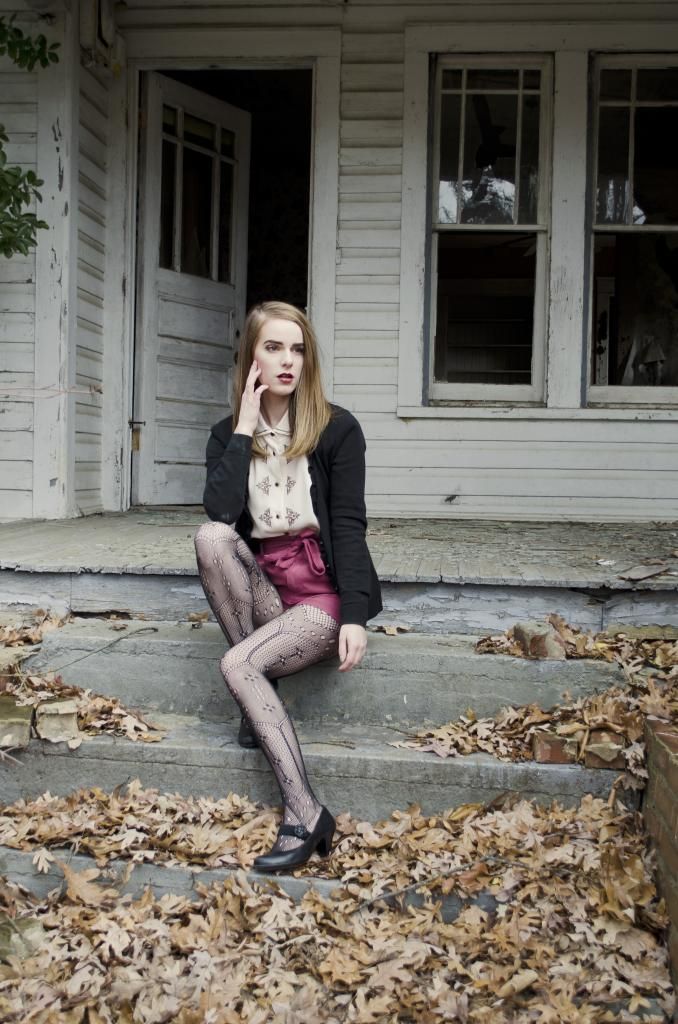
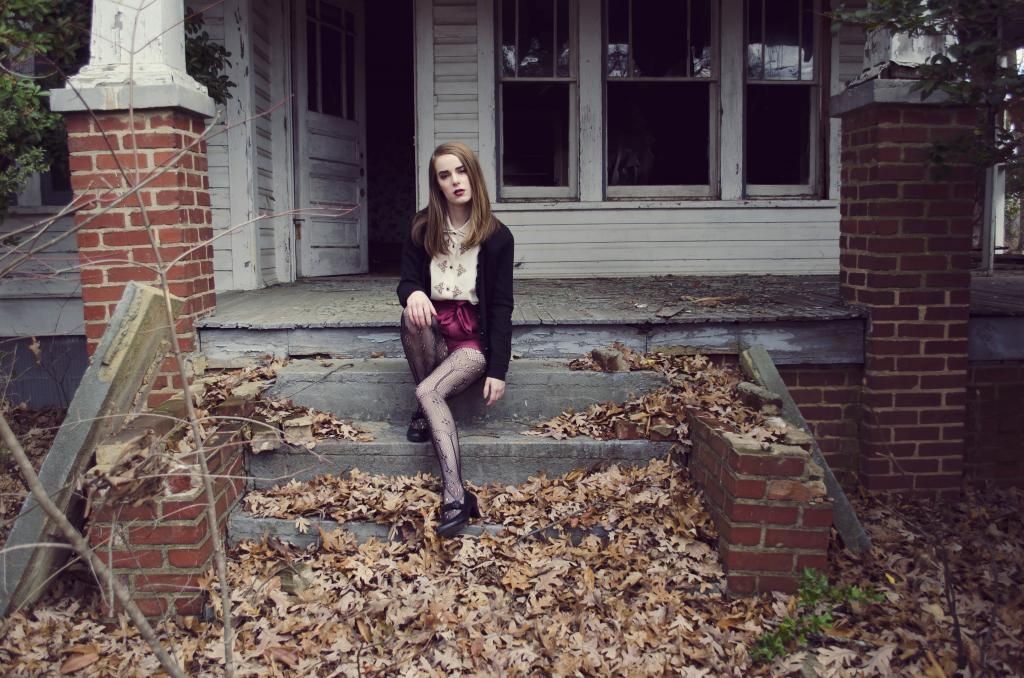
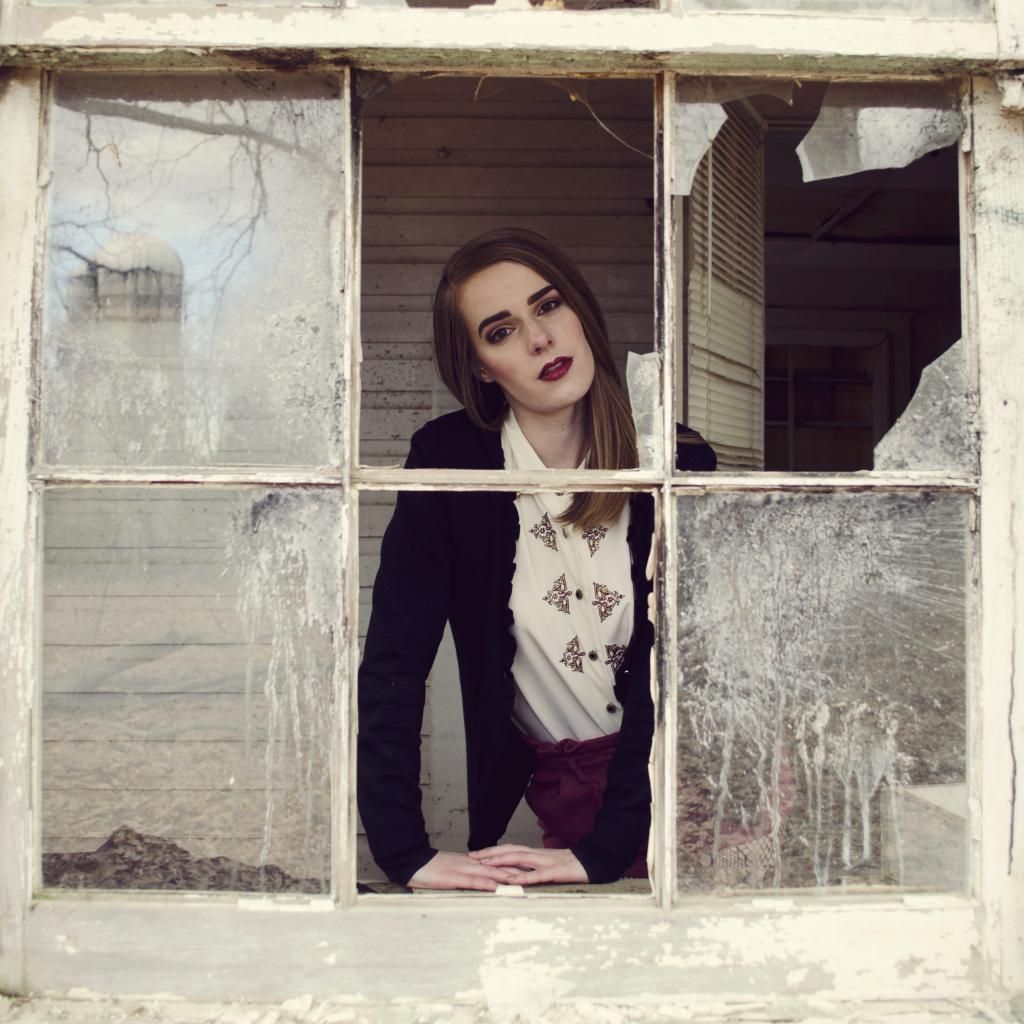
These photos were taken at an abandoned lot on the outskirts of Greensboro. It was a very old house judging by the layout and the rate of decay. Beside the house was an abandoned barn, so I assume whoever once owned the house must have worked in the barn and stables. This place had apparently been forsaken decades ago. All 
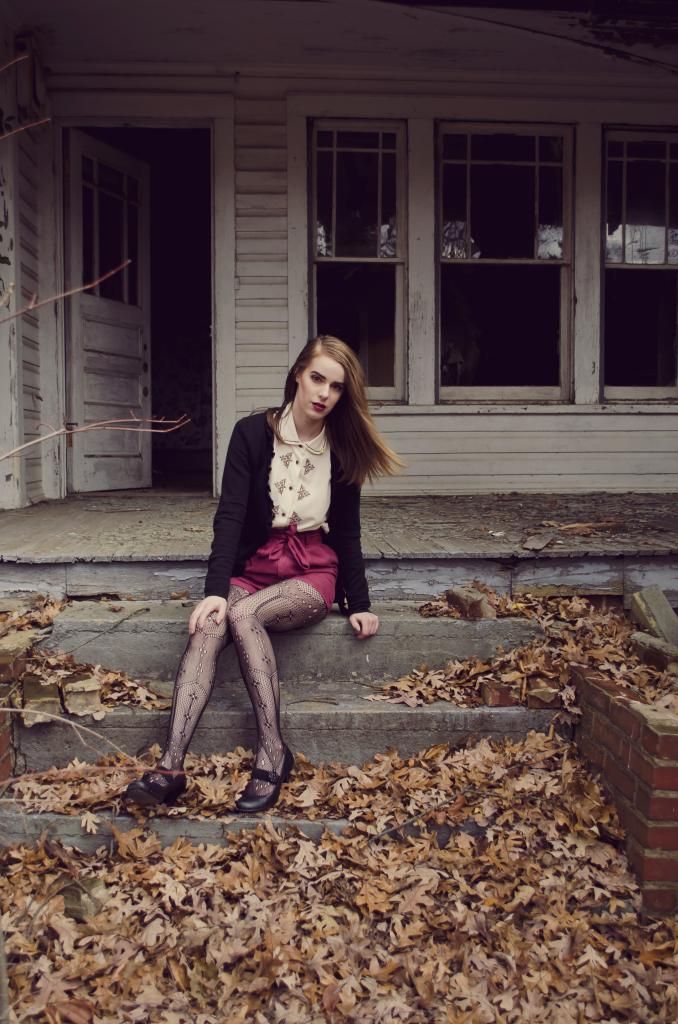
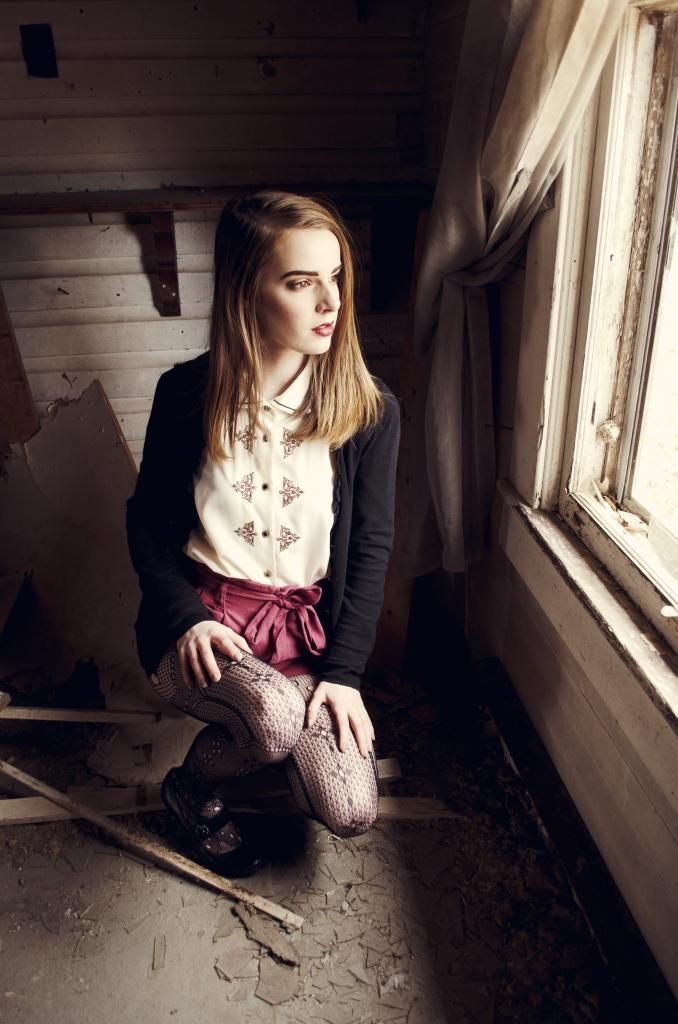
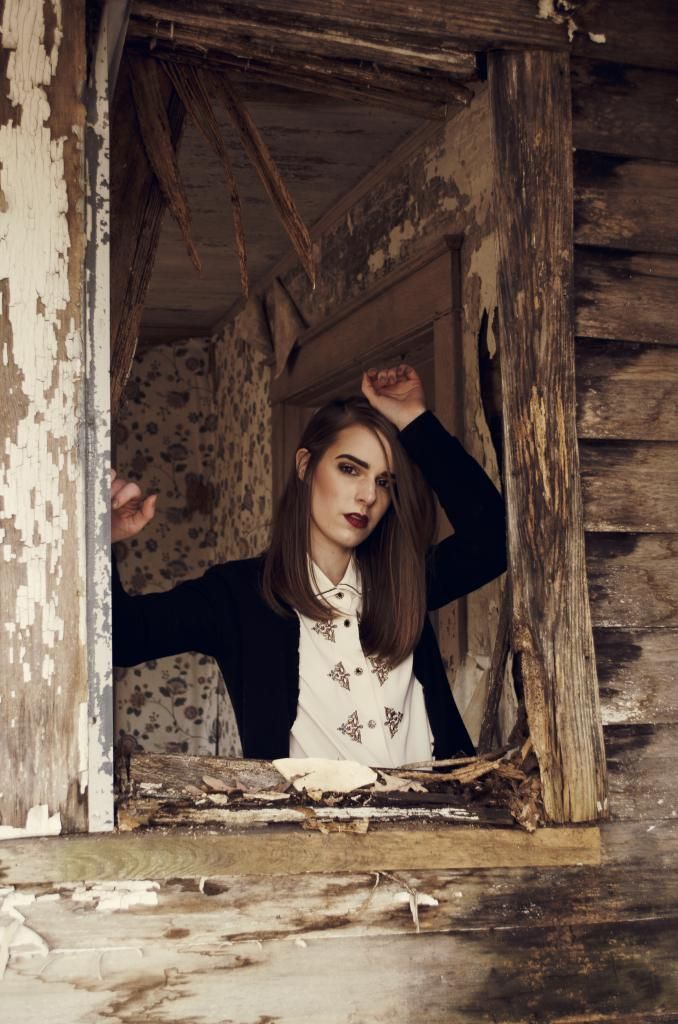
of the windows had been broken and glass lie shattered everywhere, but the long 
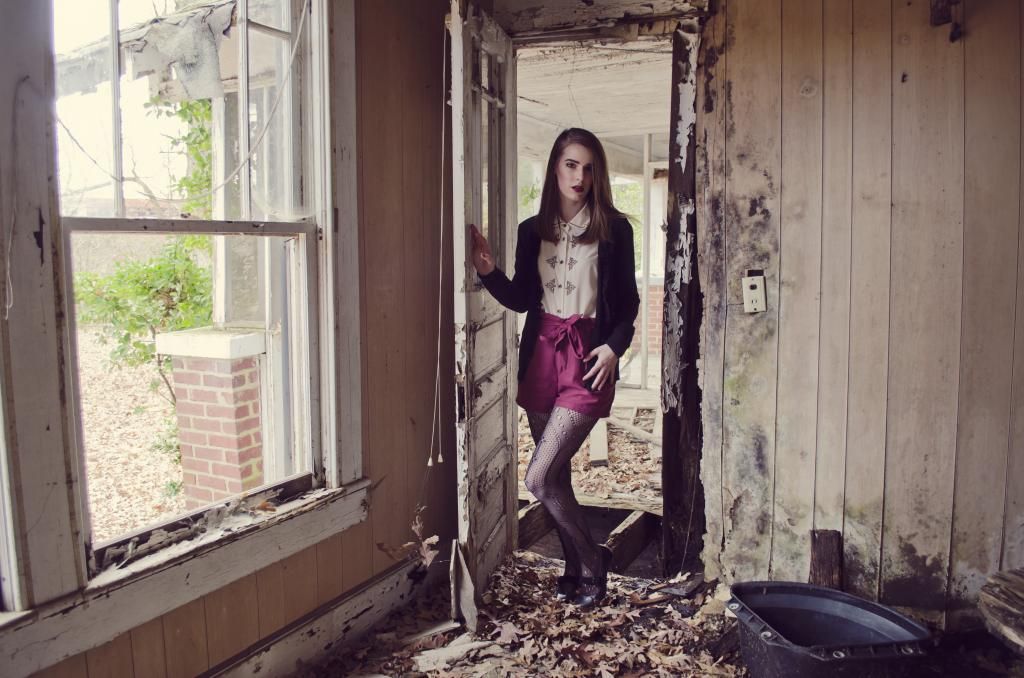
sheer curtains remained in tact and swayed eerily in the breeze at all times. With no protection from the elements, the carpeted floor sprouted giant moldy spots in many corners. There were gaping holes in some of the rooms, 
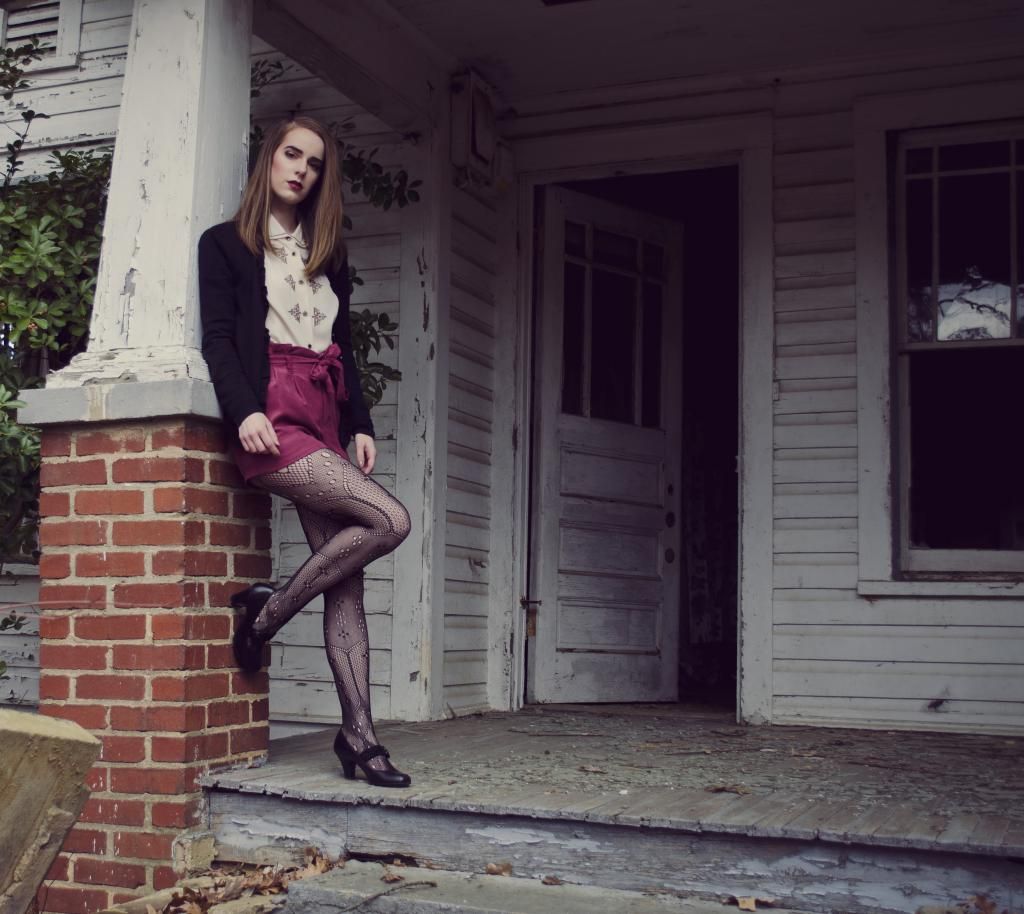
so every step Nina and I took was calculated and cautionary. You entered into the house through a long, narrow front porch which lead into a large open kitchen connecting to the other 
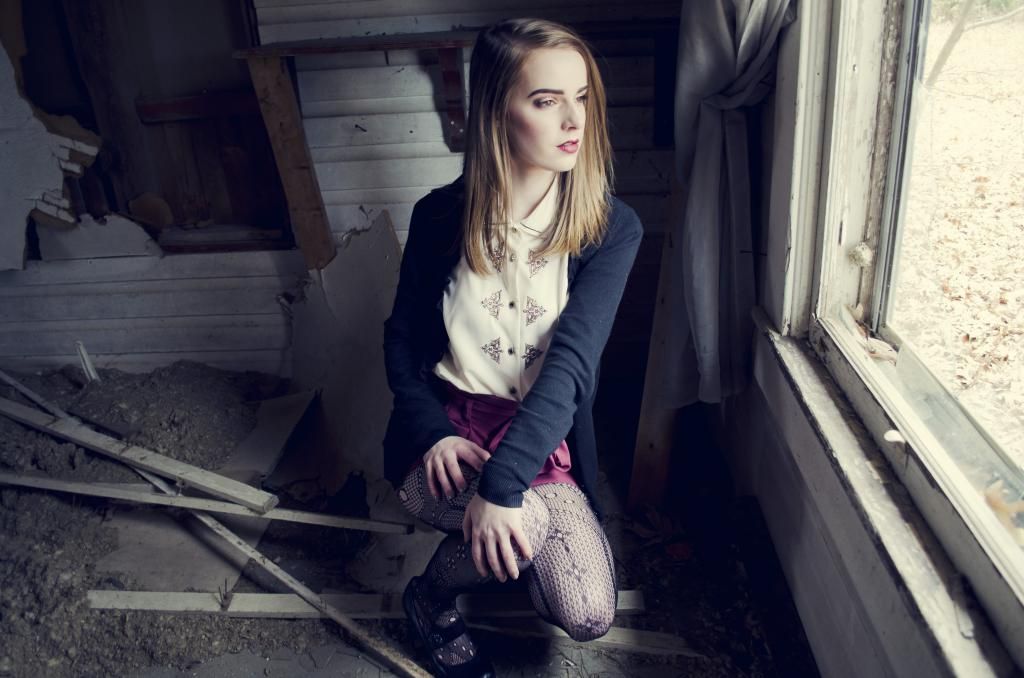
rooms. One room clearly belonged to a child at some point; the wallpaper print had preschool cartoon images of barns, tractors and farmyard animals repeated across the walls.

Sadly, Nina had learned this house and lot would be torn down sometime this month (there's a good chance it already is as I write this.) Many people had been there before, partying or generally vandalizing the place. To add to the air of creepiness, Nina learned of this place from a model who had done a zombie photoshoot there. In the kid’s room, there were buckets of fake blood splashed onto the walls.

Perhaps the most hilarious part of this story to me was how after we explored the place and came up with picture ideas, we began to shoot, and not after but two pictures, all of the sudden we heard a huge SLAM coming from one of the back rooms. We were both paralyzed with fear and had barely just begun shooting. Of course, the wind had simply shut one of the doors, but the blood and overall creepiness added to our paranoia.

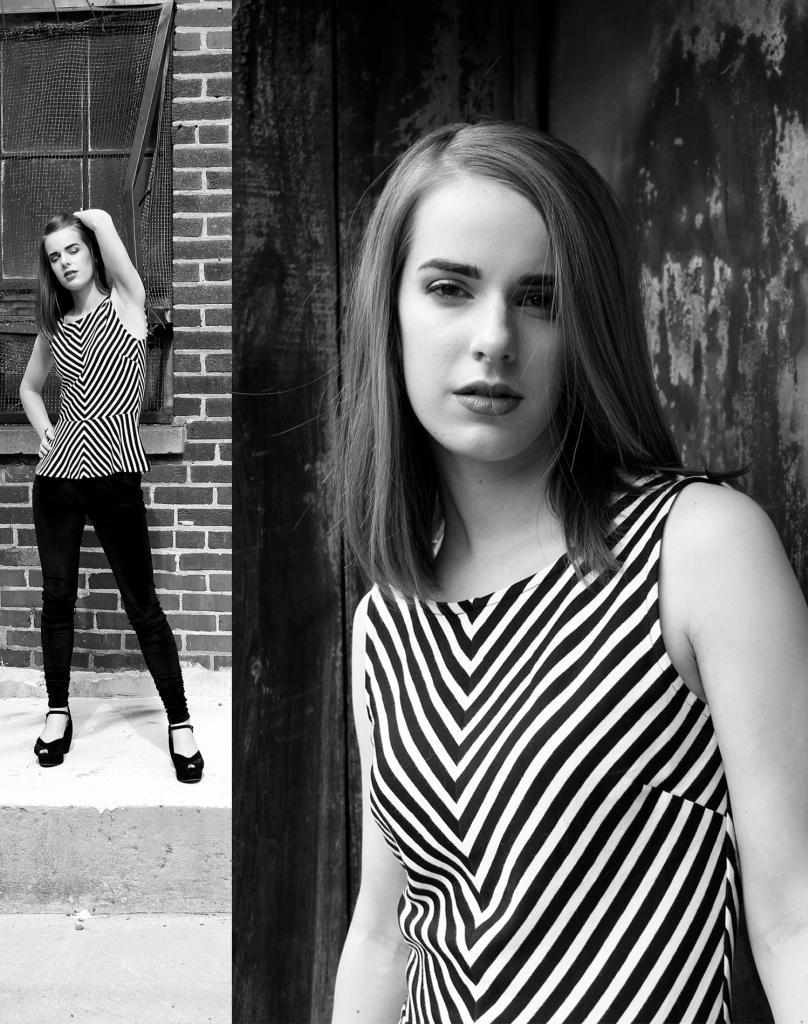
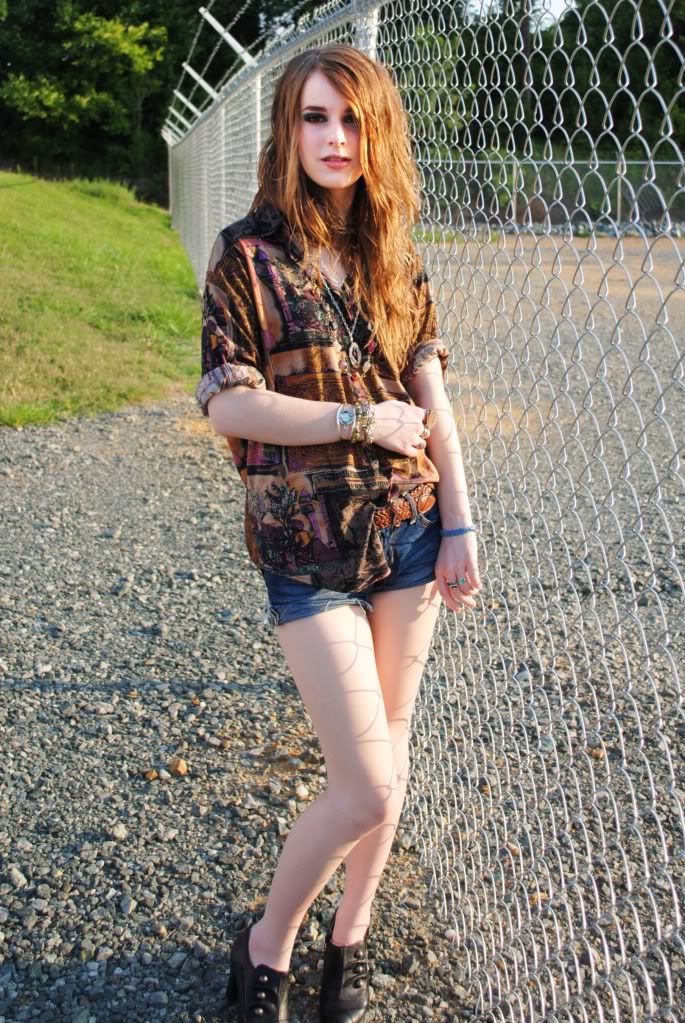
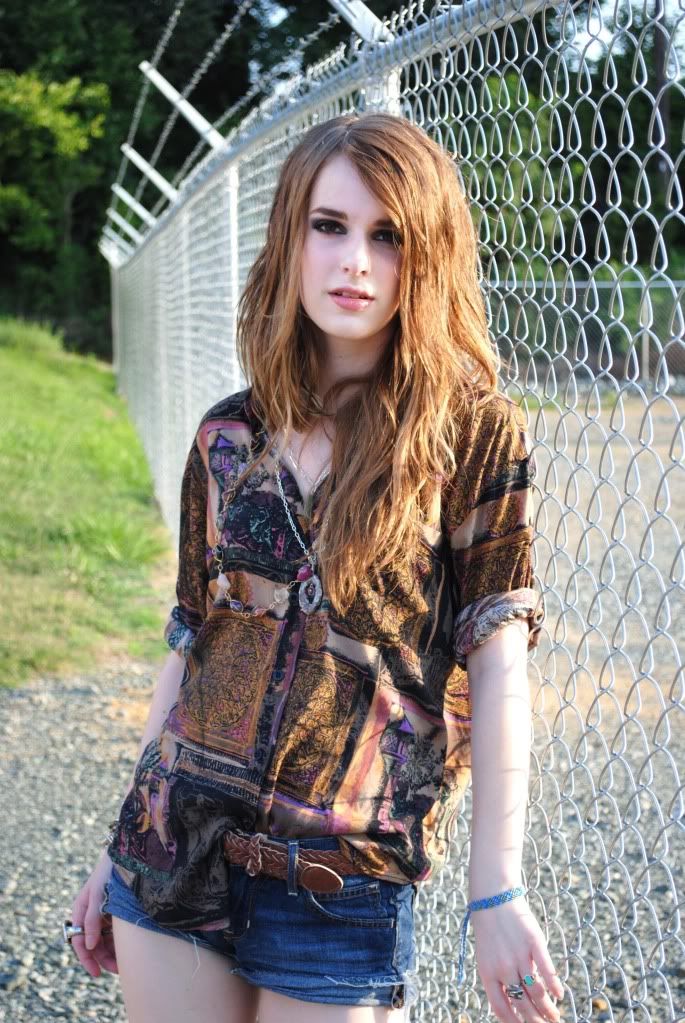
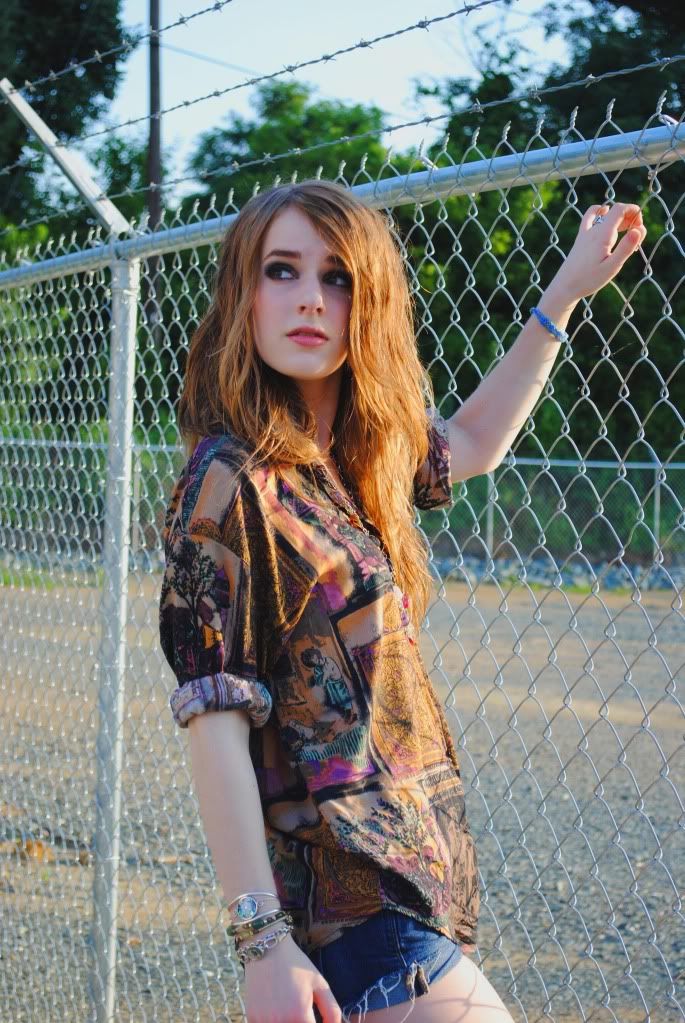
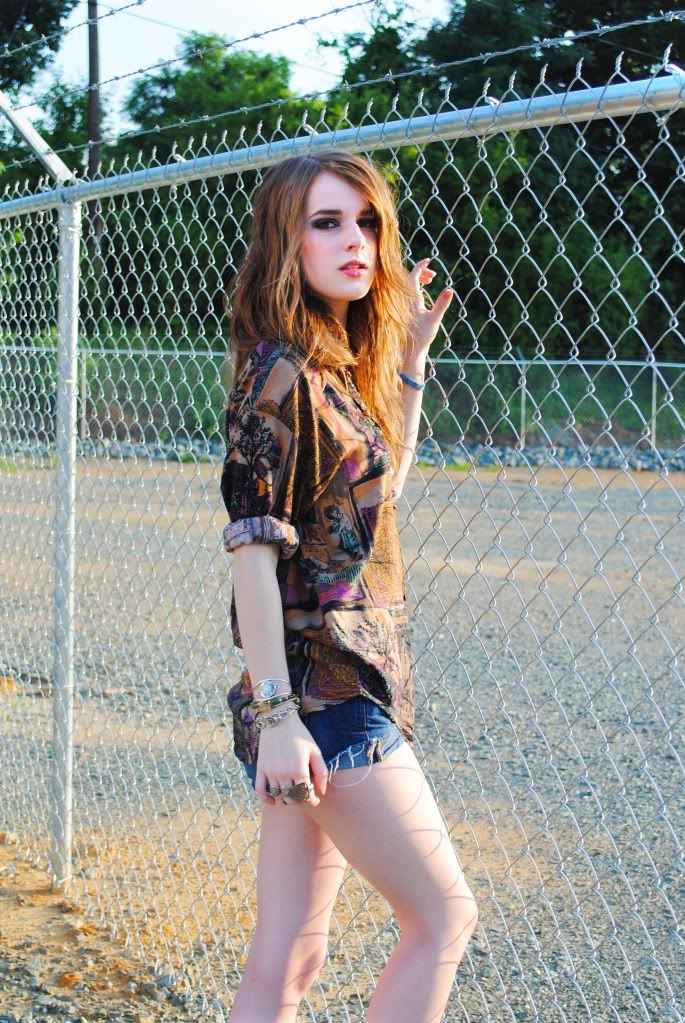
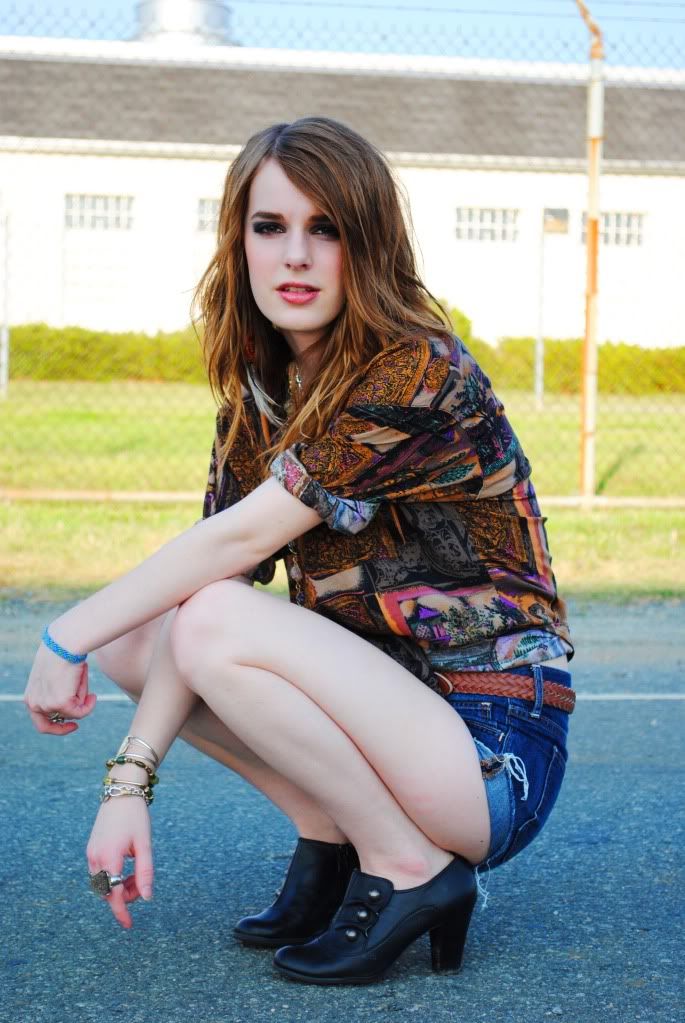
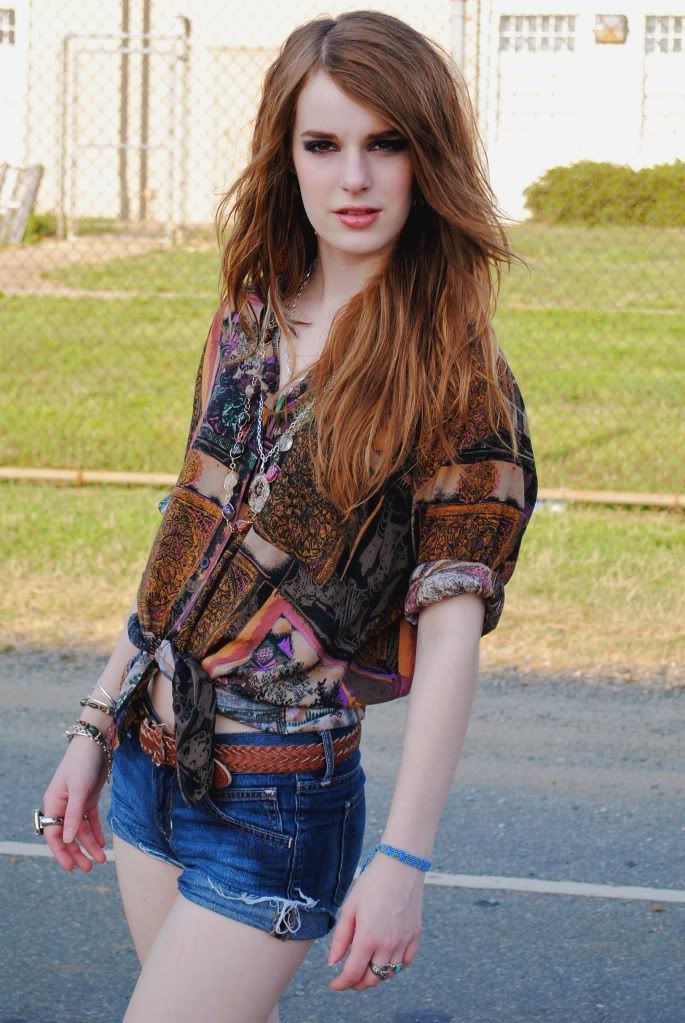
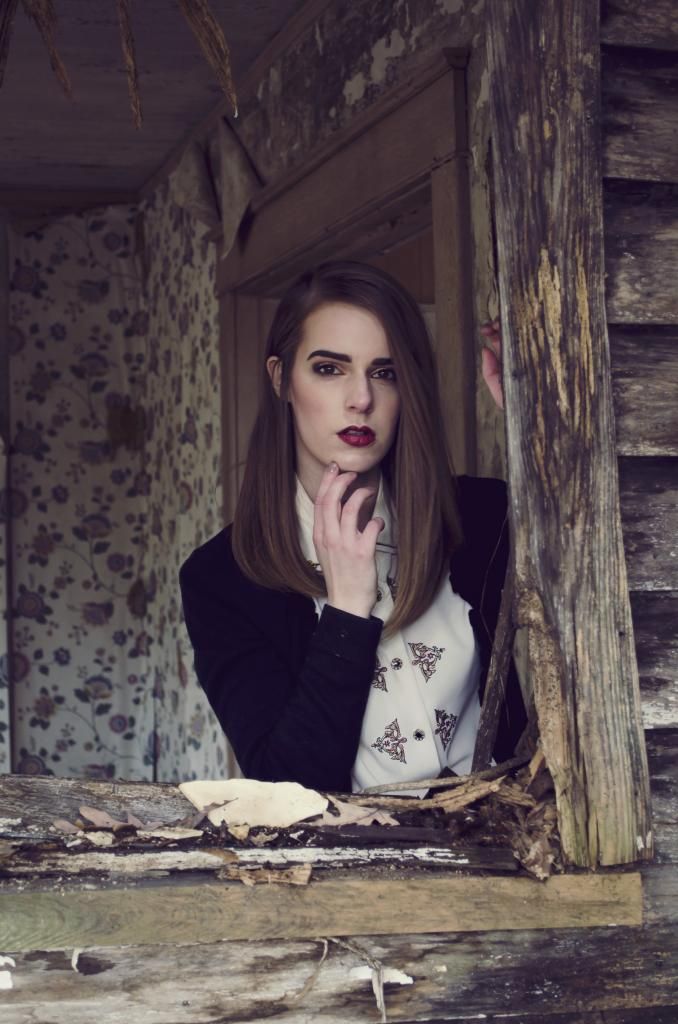
I’m absolutely in love with these pictures – but the irony is that the main style advice I planned on discussing is completely covered by my hair in the majority of the pictures, which I totally hadn't realized until afterward. 
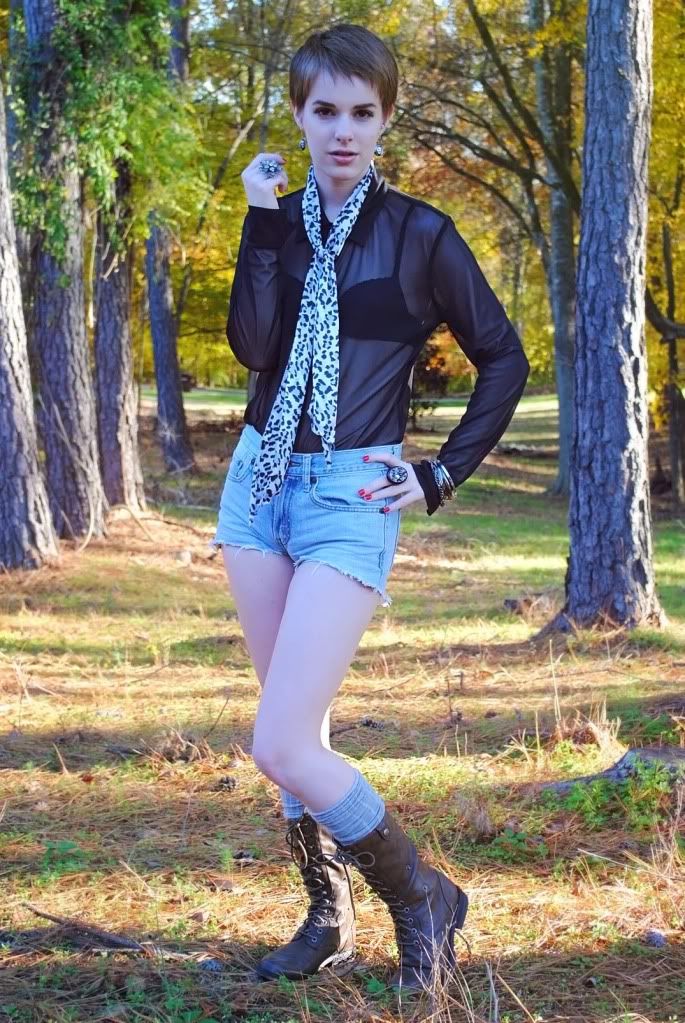
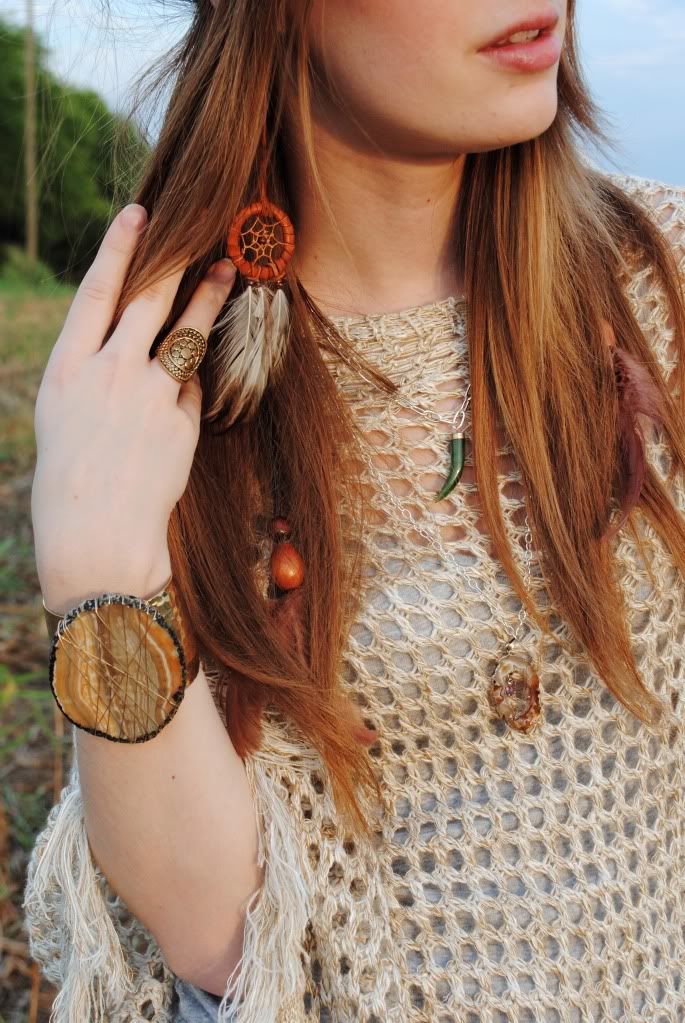
I’ve been using clip-on earrings to dress up my collars a lot this season. It’s a very simple trick that instantly elevates any outfit into something more formal. The clip-on’s that I have were actually given to me, so I’ve found alternate ways of using them.

Clip-on earrings are generally always inexpensive and easily found in most secondhand thriftstores or vintage jewelry shops. They are ideal because they won’t damage your clothing like a pin might, such as leaving puncture holes. These are easily an interchangeable seasonal accessory, but it does look especially nice when you pair them with sweaters. In most clothing retailers, I frequently see shirts with decorated collars. You can also add clip-on’s to a jacket with rolled up sleeves to give the illusion of button cuffs. I actually used this trick in another photoshoot wearing an embroidered jacket – can’t wait to post it!

I’ve read somewhere before that you can also use clip-on earrings to dress up a pair of flats or a scarf, but I don’t feel as comfortable doing so because the clip-on's don’t feel nearly as secure in those places as opposed to a collar where it might be more easily noticed if one happens to fall off.

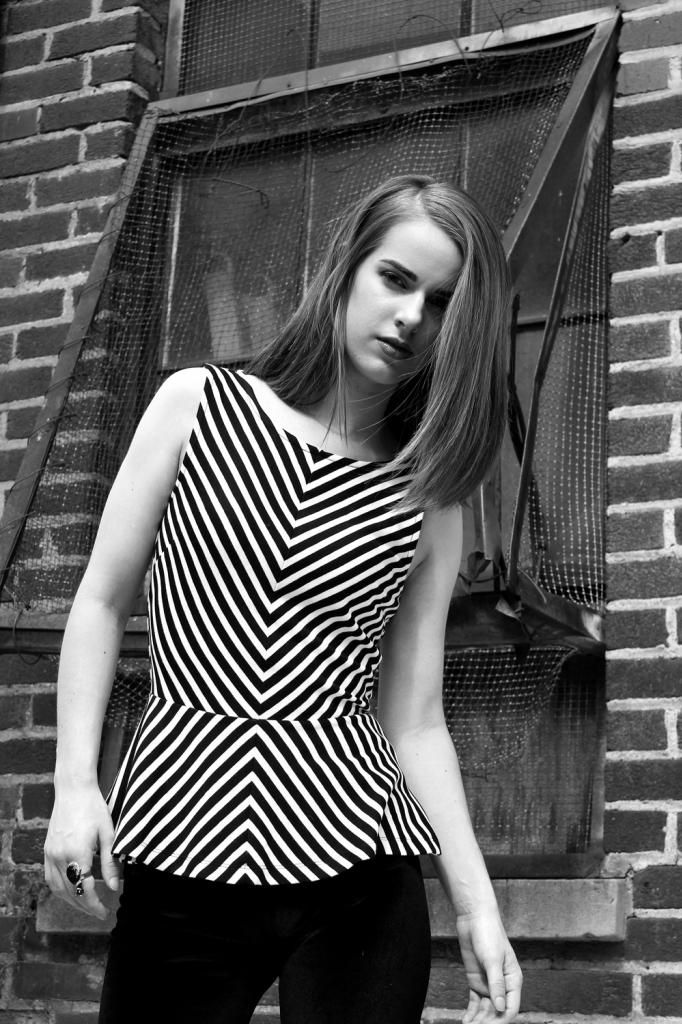
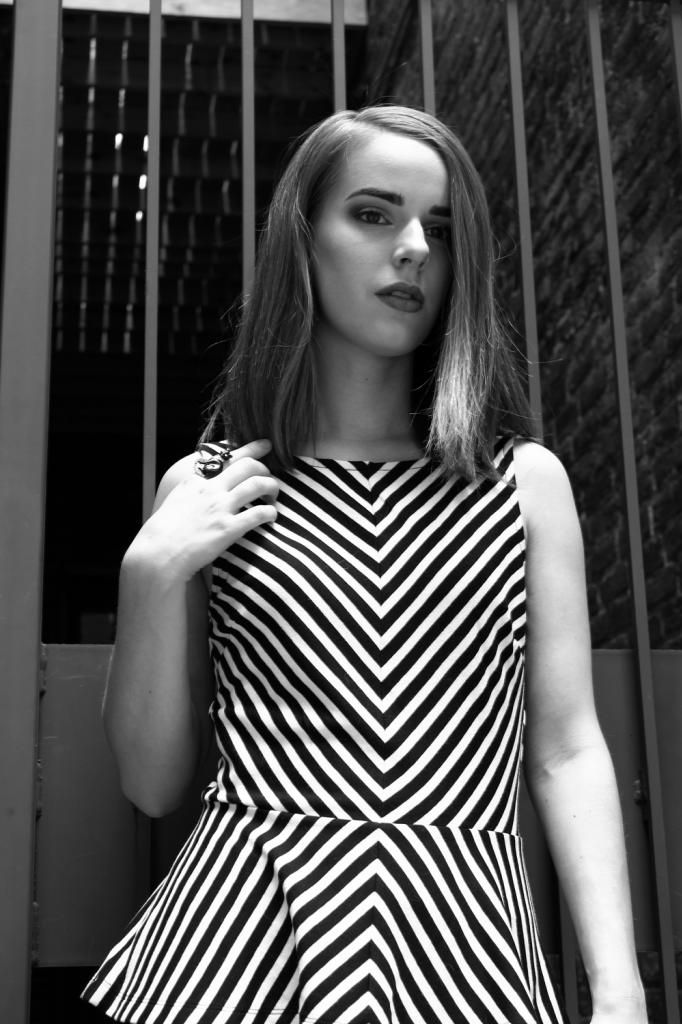
Here are some pictures to use as inspiration for styling your outfits with clip-on earrings:

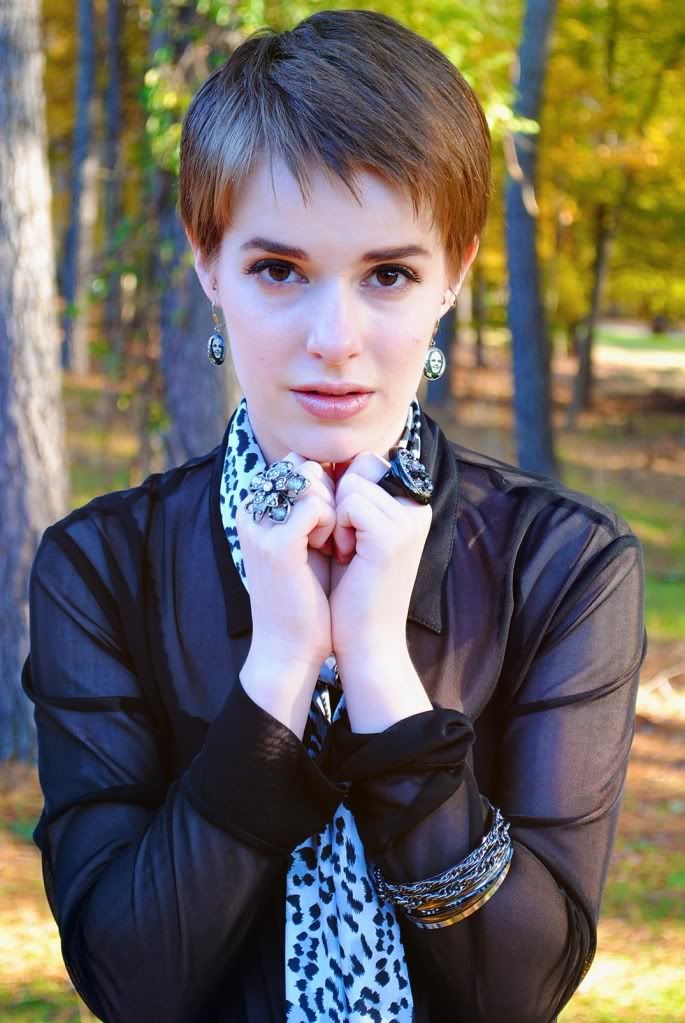
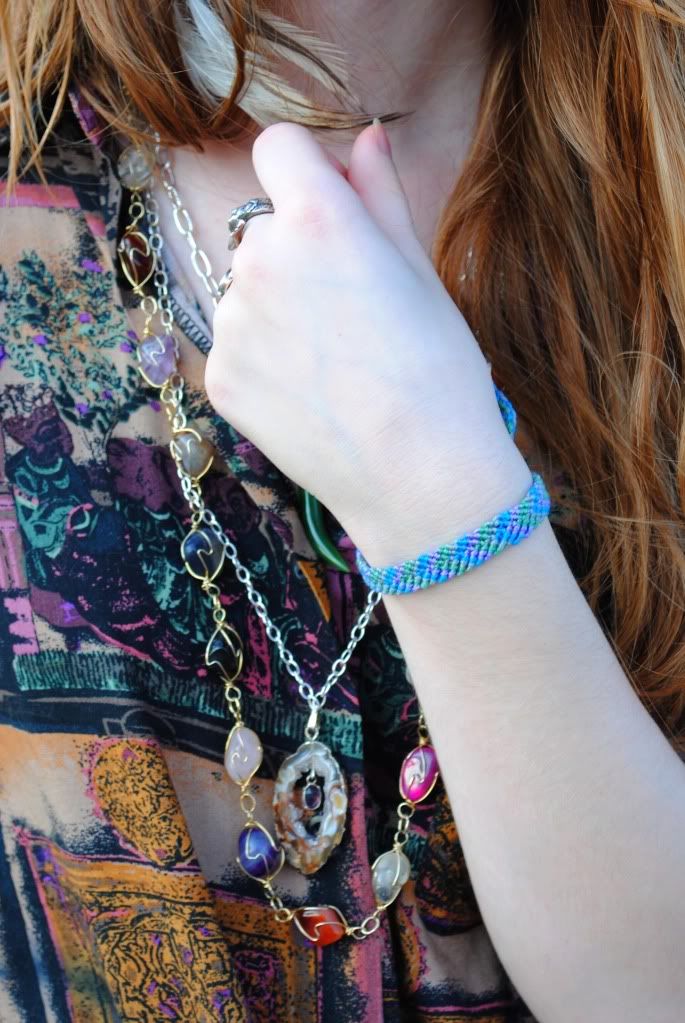
Here's a close up of the shirt and clip-on's I wore for the shoot. The shirt already had a unique embroidered print that is nicely offset by the gold and pearls.

Use clip-on earrings as faux button cuffs. Looks very vintage and expensive!

Dress up a solid colored shirt with clip-on's that have a texture or pattern. This would look really great with a sweater over it.

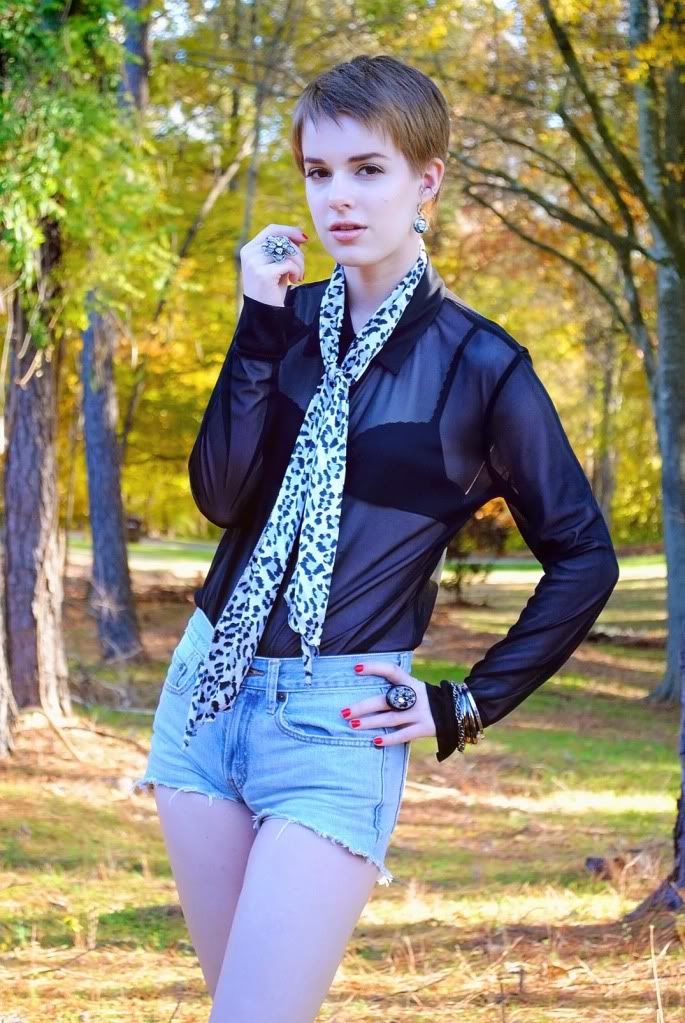
This is a sheer black button up shirt. The color black perfectly offsets the shiny, gaudy clip-on's.

I would love to see how anyone else has used clip-on's to spruce up an outfit! Leave a picture below in the comments.

xx

Wednesday, January 21, 2015

Can I Do this DIY: crop top & accessories


Photography by R. Kooy
~

There really aren’t enough occasions to dress up for in life.  I've always loved formal wear; it means we're going places. Something special is about to happen. I think the real appeal of wearing costumes is that it allows us to take on different characters or personas so we become someone else entirely for an evening. Wearing this look feels like something out of a story. And what’s even cooler is that I made two of the items I’m wearing with very simple steps which I will explain below.

This is a linen maxi skirt I found in goodwill many years ago. What’s amazing about this skirt is that someone hand painted the scene on the front and back. It was also made in Hawaii. Apart from these minor details that were inscribed on the inside of the skirt, I know nothing about it. Other than the fact I don’t think it was actually intended for wear. I might not look it, but I was slightly suffocating.


Clearly this photoshoot was taken back in warmer weather, but I still want to talk about maxi skirts for a moment. I usually see people sporting them in spring and summer months, going for a relaxed but boho feel. I have two maxi skirts in my closet, one with a black sheer overlay (I DIYed it and made the black skirt underneath it shorter…More on that later, perhaps?) and another paisley printed one with a thicker material (which was also handmade, apparently). Recently, in this bitter cold weather, I’ve taken up the practice of wearing the paisley skirt with a pair of leggings underneath and I’ve found that this provides far more insulation against wind than wearing pants alone.

So about that crop top! This is the first “Can I Do this DIY?” review I’ve done for this blog and I’m proud to say it was incredibly easy. This came from a popular tutorial floating around on Pinterest, originally posted on a pair and a spare blog (click on the two links to find two sets of instructions). 

Here’s all it is to it: get a tank top, lay the top face down, cut along the seams in the back and cut across just under the bra line. Turn the top over, and measuring correctly, make one sweeping cut up the middle. It’s not much to look at in this form, but to wear it, you cross the two long pieces you’ve just made, tie a knot in the back and tuck in any corner pieces around the neckline. Viola! Having used a random tank top from my drawer, I do advise DIYers to grab a top that is long. I can’t stress this enough. The one I had barely made the cut. The top needs to at least reach slightly below the hips… If not, you won’t be able to tie it in the back. Although the tutorial and I used solid colored tanks, I would love to see what this looks like a with a patterned top. You’ll also want to be aware of the type of fabric you use…Realistically, I doubt this top has much longevity, especially if you have to wash it (I would hand wash it if you absolutely have to) but I made sure to use a jersey fabric because it stretches and doesn’t easily become threadbare.

I made this hair accessory out of a thrift store floral arrangement I found for twenty-five cents. All I did was spray paint it a metallic gold and let it dry. Using one of those packaged sponge buns you can find at most beauty suppliers, I pulled my hair into a tight bun and placed the floral pieces accordingly. However you want to place them is up to you; I went for a denser, fuller look. With hairspray and a little faith, they neither shed nor broke, but driving in a car with a low roof was a challenge! When not wearing the arrangement, you can use it as a nice decorative display by putting it in a vase on your vanity or night stand. Isn’t it so cute?!


Wednesday, September 17, 2014

Mirror Mirror


If you stare at this top too long, you might go cross-eyed. Or find yourself in the Twilight Zone.


It's been my dream for a while now to do a very dramatic black and white photoshoot. This bold striped top presented the perfect opportunity to execute this idea. I’ve paired this with velvet black leggings and one accent accessory to really allow the print to speak for itself.


Peplum tops are hugely popular finds in most all clothing department stores these days. It took me a while to jump on this big trend, but now that I've committed to it, I’m in love with the concept. It can be dressy or casual. I almost think of a small dress when I look at it. It’s flattering for most body shapes too – no matter what size you are, it gives you nice, exaggerated curves with the flared bottom piece.

One of the topics I wanted to expand on more from my last post was “Can I Do This DIY?” - This peplum top inspired me to want to research other ways to get a peplum top without finding one on sale somewhere, which is exactly where I found this beauty on the banana republic clearance rack over the summer.

I’ve discovered some tutorials online that show us just how to do that. Except the problem is, the tutorials require sewing, which I have very little skill in. I have all the resources at my disposal (sewing machine, needle, thread) but I’ve just never been great to know what to do with each material. However, this tutorial looks incredibly easy and I’m going to challenge myself to try this. I like the idea of converting an over-sized t-shirt into a peplum top. A band shirt would be very edgy, but I do like solid colors or patterns myself. There are ways you can play with the neckline in this tutorial, you can do a rounded edge like shown, or easily cut a V-shape into the neckline like the one I’m wearing. I fully intend on playing around with that. I also like that this is a video tutorial too – sometimes pictures don’t fully explain. You can watch the video at this link.

This isn’t a great example of my DIY posts to come, simply because with five college classes and working nonstop has prevented me from being able to sit down for one long evening and try it out. However, if you happen to be a great sewer, here’s your chance.


The most useful thing that has happened during my extended blogging leave is a proliferation of a whole new platform to share pictures with a larger community: Instagram! If you look to the sidebar, I've got this nice little widget that shows all my Instagram photos on a slideshow for your viewing pleasure and convenience. To make this more fun than just sharing the same old pictures, I’ve figured out how to make this more interesting: I will be posting outtakes from all of my photoshoots on my Instagram - @ water_lilies. These exclusive pictures will not wind up anywhere else. (Oh come on, don’t act surprised I’m shamelessly promoting my Instagram account. I’m a fashion blogger, it’s what I do.)


Next time, I'll be saying a warm farewell to lovely summer weather and summer clothes with one last outdoorsy, hiking look. Until next time!

-K.


Tuesday, November 8, 2011

Unlimited girl, unlimited sigh


black mesh button up - thifted, scarf - thrifted, jeans - thrifted/DIY, boots - NOT THRIFTED.

Take a look around you. No, not around the room, my web page. I've made slight adjustments here and there that I think will better cater to your bored web surfing/casual browsing/fashion blog hopping/daily check-up? (any out there?!)/routine check-up/first time viewing! For one, I've taken the burden of fixing that Looks page, if you feel the need to look at my previous looks. I'm working on an "about me" page, which is always a struggle for me to reiterate what I believe my identity is, and how I can control a first impression.

Also, I want a banner. And a logo. Wouldn't that be nice? Something a little more welcoming than an unfamiliar song lyric. A cool one though.

Also: big update! I've joined two new fashion blogging/networking sites. Chicismo, which you will see a link to in the side bar, and I got approved for Independent Fashion Bloggers! What an amazing community, I've been getting responses like nonstop. I really do love this fashion blogging world, it's very supportive of each other - there's no competition as far as "out-fashioning" one another, it's a very fair and enthusiastic world.

I don't know if I should say this already, but I feel like even in the 20 odd looks I've produced, I feel like my style has already changed. Maybe it's the hair. In my daily wear, I feel the constant need to cater to what looks good on short hair. (Also, I'm going through this phase, which according to a friend who once had short hair is a normal phase, where I constantly feel the need to wear skirts and dresses and other uniquely feminine pieces just to make sure absolutely everyone I see understands and grasps that I am in fact a girl with this short of hair.) but I'm ok with it! Skirts are more stylish anyways (have you ever worn a skirt on what you considered your "off" days? It feels so unnatural doesn't it?)

I feel like I started this blog with a vision to be edgy and maybe in blend in with the a-typical "hipster" (pardon my French) look with Jeffrey Campbell boots and cut off shorts. But that's not really me. I do have a personality "ism" where if I strive to be as 100% original as I can. Meaning if I've seen someone else do it, I have to do something different now. It's very difficult. But how else are trends made, forged by personal style and a vision for what's next?

~

It was a bold move even for myself wearing nothing by my bra underneath. Phew, finally called out the elephant in the room. But it's more liberating than you think. I started this topic and now I don't know where to go with it, so I'm just going to conclude it with that and say try it.

Andddd we see the first of the combat boots, my designated go-to boot for this fall/winter weather approaching. Sturdy enough to wear everyday, stylish enough to make it look like you're actually trying today. Also the tights + knee high socks + combat boots combo is one I have planned for many, many, a-looks that are a-coming soon.

-H.

Saturday, August 13, 2011

Blackbird claw, raven wing


poncho - f21, jeans - DIY cut off, boots - some conventional shoe store I think. boot chains, vintage. jewelry - everywhere

Cha-chink, cha-chink, cha-chink. That's what my boots say when I walk. These Harley Davidson boot chains are pretty wicked, I feel like John Wayne or some classic cowboy walking into a saloon. All I need is the moonshine and I'm set.

And what a beautiful endless expanse of land - it's like inhaling infinity. So serene. So comforting.

Ponchos! It is simply impossible to be unhappy while in a poncho. (10 points to whoever gets that reference...I see you hovering over google bar.) This poncho has become my best friend this summer and I'm afraid I'm just going to have to keep it even in the winter. Come on, a winter poncho could work! No? Maybe?

Lastly, headband. I love those hippie headbands. However, cons of a head: they are not always wearer friendly or practical. I get Dumbo ears, my hair stands up, it's just no good. Also, they leave a funny halo around your forehead if they're too tight. Pros: they just look good, ok?

~

Life updates: I'm heading off to New Jersey next week to meet a friend I've met online (nobody freak out, we've known each other for well over a year and have shared in podcasts together.) We're going to see the premiere of Fright Night with David Tennant in it. We've been waiting for this movie from the moment we found out about it about a year: it is no secret that I am a David Tennant fan girl (from Doctor Who, mostly). It so happens my friend is a Christopher Mintz-Plasse fan girl. One movie containing both of our obsessions... This calls for a meet up. We both have a predilection for horror movies as well, so this was just one big dream come true with a cherry on top and wrapped in ribbon. I'm hoping to meet up with some other friends while I'm there.

Oh, and there's that thing called classes starting up this Monday for me as well. This will be a true test of character for me to discover how well I can balance community college classes and my fashion blog. I have faith. I have faith in my ideas.

-h.


Not exactly fashion related - but an interest of mine nonetheless!


Wednesday, July 20, 2011

Wait for the Summer


shirt - thrifted, shorts - DIY cut off, belt - thrifted, jewelry - all over the place, but specifically: friendship bracelet - made personally for me!

Feeling very bohemian lately. I think this Yeasayer kick is what started it all (go look up "wait for the summer") I have a habit of finding new music to indulge in and listen to it on repeat.

I feel like I haven't been true to my real tastes in the latest posts. Typically I go for more complicated things like above.

One thing I'd like to note: do you see my friendship bracelet above? Those things are quite popular now. My friend made me one! Let me pick out the colors and everything. It's so reassuring to have something specially made for you and your tastes. I'm an etsy fiend normally because of this philosophy. Plus, buying a store bought friendship bracelet ruins the entire purpose of having one - they're supposed to be made by a friend, duh.

Not really feeling myself right about now, I've got a cold :( in the midst of summer too! I'm kind of brain dead right now.

-h.